5 'Cookies in a Jar' Christmas Gift Ideas


Yesterday I visited the General Christmas Collective Market and was blown away by the assortment of crafty items that were on display created by local designers. It was really tempting not to go crazy and buy everything. Luckily, you had to get cash out so you were physically aware of how much you were spending. Yay!

I bought a couple of gifts for friends & family, but best of all I got some GREAT ideas of Christmas gifts I could make for others. I passed a stall that had assorted cookie mixes in glass milk bottles. I thought it was such a great idea I scoured there net for some ideas. And low and behold, these are the 5 best ones I found!

5 'Cookie in a Jar' Christmas Gift Ideas

  1. Cranberry & White Chocolate Cookies from My Baking Addiction
  2. Double Chocolate & Toffee Cookies from Crazy Little Projects
  3. Chocolate Peppermint Cookies from Crazy Little Projects
  4. Paleo Christmas Cookies from My Natural Family
  5. Reese's Peanut Butter Cookies from The Frugal Girls

If you are stumped for ideas, go DIY and make a few 'Cookies in a Jar' gifts. Your baker friends and cookie loving family members will LOVE you for it!


xo Elise


Image via MBA


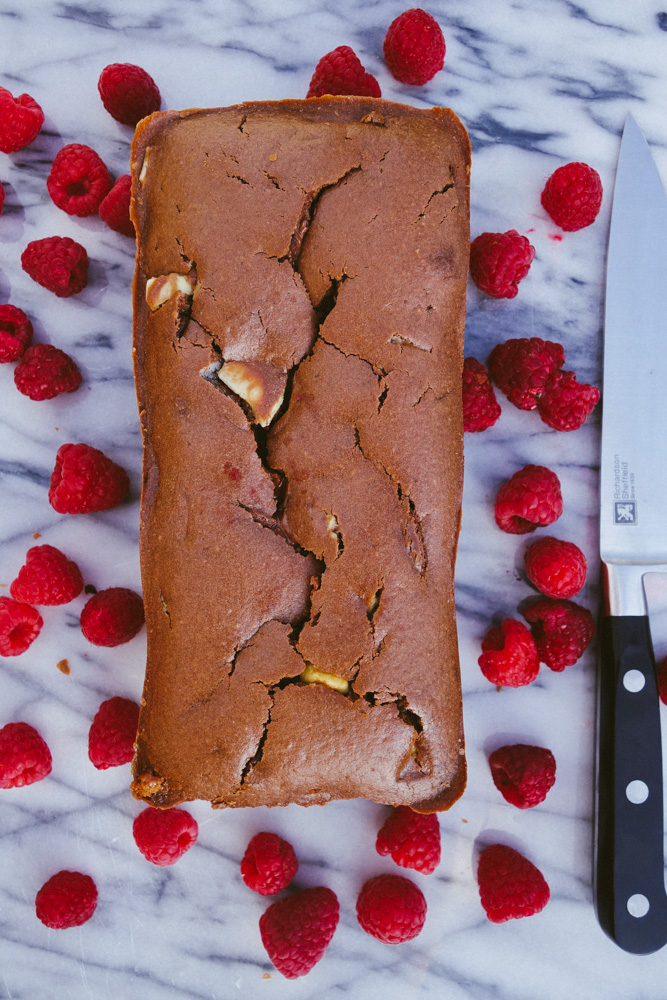
Gooey Triple Chocolate Loaf!


Gooey Triple Chocolate Loaf!

I'm baaaaaaaaack!!! This time with a .com on the end of this fancy ol' url. It's been a while.. six months to be exact! And I have missed you. Like a lot. But the break I had was exactly what I needed to get clear on exactly what I want to do with this blog and where I'm headed..

But that's a totally different post altogether! One that requires a bit more thinking + breathing space.

So today I've got a DELECTABLE recipe for you. One I made several weeks ago that I swear I still dream about.

Choc-addicts, you're in for a.. heart attack!

But do we care?! DO WE EVEN CARE!?!?!

Not when it comes to this gooooooey triple choc loaf recipe I scored from The Londoner!! Altered to my liking of course ;)

But before we even get into it, I have to admit, I didn't even know chocolate loaves were a 'thing'. And when I told my colleagues about it, neither did they. Hrmph!

Those brits. They know how to do it differently I tell ya!


Ingredients

  • 180g room temp butter
  • 3/4 cup caster sugar
  • 3 eggs, beaten
  • 1 cup gluten free self-raising flour
  • ½ tsp baking powder
  • 1/2 cup milk
  • 4 tbsp cocoa powder
  • 1/2 cup milk chocolate melts
  • 1/2 cup white chocolate melts

Instructions

Pre-heat your oven to 150c, then beat the butter and sugar until light & fluffy then stir in your eggs with flour, baking powder, cocoa, and milk.

Mix in your chocolate melts with the batter and stir until evenly distributed. Pour batter into a loaf tin then place in the oven for 45 minutes and then let the chocolate aroma waft through the house.

Once baked, take out of oven and place on a wire rack. Eat as you please. :)


Okay, I've got another confession to make.. My chocolate melts sank to the bottom of the tin because I melted the butter too much. Make sure you don't do this if you want the chocolate distributed evenly. On the other hand the loaf sort of became an upside down chocolate cake and it was still 1000% DELICIOUS!


xo Elise

P.S - 5 summer cocktails

Image via The Londoner

Sunday Reads #7: Matthew Lewis, Sleeping Doctors & Dennis the Dachshund


Wow! What a week it's been. I've spent most of the time out and about running a swim school, attending a children's services conference, painting (apparently creepy) masks, playing hockey, having dinner with friends and attending a pink ribbon breakfast!

What have you been up to?

  1. Dark chocolate salted caramel marshmallows

  2. Amish makeover story

  3. I laughed so hard at what these Mothers confessed about their children!

  4. I cried watching this couple age 70 years.

  5. Sleeping doctors everywhere.

  6. How could you not notice your partner proposing to you!?

  7. Would you let your partner dress you?

  8. Dennis the dieting Dachshund - dawwwwww...

  9. Matthew Lewis *drool*

  10. 29 dollar store buys that'll keep kids busy


xo Elise


Image via

Dark Choc + Salted Caramel Marshmallows


Dark Choc + Salted Caramel Marshmallows

I've been on a baking craze this weekend.

And while browsing for recipes I discovered this dark chocolate and salted caramel dipped marshmallows recipe on Baker by Nature.

There is literally no reason you shouldn't be making these today.

Ingredients
  • Dark chocolate melts
  • Salted caramel sauce
  • Large Marshmallows

Instructions

Dip the marshmallow into the caramel sauce. Melt the chocolate, then dip into the mix and place on baking paper to set.

xo Elise

Sunday Reads #6: Meals on-the-go, Mothers Day and a New Princess


Argh! This was the most abrupt start to a Sunday ever. I missed my alarm and woke up when I was supposed to be down at the Hockey turf. Springing out of bed, I fumbled around half asleep trying to find my uniform, scoffed down a banana and scurried out the door.

We lost.

Think I'll just go read some articles now..


  1. If you haven't read it yet, check out My Blogging Story

  2. There's a new princess in town

  3. Woman leaves 95k job to sell ice cream on an island

  4. 18 struggles of being an introverted extrovert

  5. And now I'm crying too..

  6. DIY Geode jewellery boxes!

  7. Ahhhhh I love you friends memes

  8. In June I will be spending 21 days here.. *yikes*

  9. Tina Knowles (Lawson's) beautiful love letter to her daughters

  10. And a meal-on-the-go green smoothie recipe!

xo Elise

P.S - Happy Mothers Day!

My Blogging Story


I've been blogging since January 2011. 

When I started, I was passionate about personal development and wanted to write about it over on www.elisemcdowell.com. I called it 'The Inner Vibrance Project' and I championed the core message of practicing self-love and having a healthy body image (which  by the way I still whole-heartedly practice)

But after a year I started to get burnt out. I was blogging almost every day, and although I had my topic, I didn't have a clear direction and I felt like I was running out of things to write about. Because how many times can you actually write "practice self-love" before you want to kill somebody?

The truth is, that's not what was really happening at all. On the surface, yes. But underneath? I was struggling with my upper limit problems. (Definition: An internal thermometer for how much success, wealth, happiness, love, and intimacy we’ll let ourselves experience. That’s our upper limit setting. Kind of like our success comfort zone.)

Because this is what was actually happening: My blog was growing traction, I had been marketing every single day, making new connections with other self-help bloggers, growing my brand and building a strong readership. My name was getting out there. I was selling affiliate products and had made several digital products including ebooks and e-courses, and they were selling like hot cakes (Mmmmm.. hot cakes). I was literally on my way to becoming a thought leader with a "business".

BUT, and it's a big one. I didn't know how to turn my blog into a business, I didn't know the next steps, and I felt guilty about the money I was making because it felt too easy.

And so I freaked out, sabotaged it all by getting sloppy, deleted a lot of my popular content, abandoned my readers and stopped blogging for TWO YEARS.

Because why not?

2012 to early 2014

During my two year break, even though I still felt stuck and unclear, I continued to study and read books on blogging and business, I invested in some blogging courses, continued to work on my own personal development and would read my favourite websites every day for inspiration and creative release

Lifestyle and DIY blogs became a huge guilty pleasure of mine, I'd always wanted to create one of my own. I actually did early on. It was called 'Pretty Delights', and it was soooooo homemade. I did the blog design myself, my photos were taken by an old camera and then heavily edited on PicMonkey for a "cool" sepia tone.

And to my surprise the damn blog started to gain followers! People started leaving more and more comments, asking for advice and sharing my posts. I was beside myself. And as it became more known, I again freaked out and completely abandoned it. I then eventually deleted it because I didn't believe it was good enough.

And I STILL couldn't see what I was doing to myself!

It wasn't until recently (this year) that I FINALLY connected the dots. That I was completely sabotaging my own success. And of course I was, I'd never known what true personal success was. I'd never made money on my own before. I'd never built something from scratch before. I'd never gained readers and followers who believed in my ideas before. I'd never built a business!

Yes,  I realized all of this even after I had started The Confetti Room.

*face palm*

So what do you do when you realize you've been cutting off your nose to spite your face (and nervous system)? You set up a fool-proof (or in this case, Elise-proof) plan to build a blog with the right foundation. Because giving up is NOT an option when you are passionate about it!
Because of all of that, I was able to do a lot of planning for The Confetti Room. I took into account all the mistakes I had made and all the things that had worked in the past and put it into my blog plan. I was able to get clear on the direction, the type of voice I wanted and my procedure for when I start freaking out and my upper limits start playing up.

And now? Things are going really good. The Confetti Room is growing slowly, but surely. If I start freaking out a little bit, I give myself a few days break and then come back in full force to pre-write and schedule several posts. I like how the blog is right now. I love the design (I am a recovering design changer) and I'm finally happy with the vibe the blog gives off. There's definitely always room for improvement, and I'll definitely be working on those things in the future.


So where to from here?

I've got big plans for the next few years. In June, I will be venturing deep into the Marlborough Sounds, pushing myself well out of my comfort zone through challenge in the outdoors with zero access to phones, computers, ipods, wifi or any form of technology (more on this later). When I return I will be returning with a purpose to focus heavily on building my personal development business (more on this later). Keyword: business.

I've found with any project I want to make successful, and rapidly, I literally have to pour 150% of my sweat, guts and energy into it. So The Confetti Room's content load may reduce significantly during this period.

But don't worry, there are bigger plans for TCR in the works. But for now, I'm keeping this space as a creative outlet solely focused on DIY while I build my business.

Next week I will be compiling a list of my best blogging tips for you to take away and use. Keep an eye out! And if you have any blogging questions you'd like me to answer, feel free to submit your question here.

But for now, what I'd really like to know from you is, what's your blogging story?


xo Elise

P.S - 25 ways to beat bloggers block

Two-Ingredient Homemade Tinted Lip Gloss (the easiest tutorial ever!)


Ready for the easiest homemade tinted lip gloss recipe of all time?

I bet you are!

Now, I'm not the biggest lip gloss fan. Having sensitive skin takes all the fun out of that. The only 'lip gloss' I tend to use is.. vaseline. 


I know right.

Vaseline has been my saving grace since I was a teenager. Between chapped lips at school in the winter to raw thighs from swimming in the sea, vaseline has always been my go-to fixer. And even to this day I still use it for a multitude of purposes, because it's cost effective, helps my sensitive skin and lasts foreverrr.

But sometimes, you want a little bit of colour. And for me that literally is, sometimes.


So I figured out a way to get said colour, without going all expensivey and staying homemade.


Two-Ingredient Homemade Tinted Lip Gloss


Ingredients

  • Lip gloss tub
  • Bowl
  • Mixing stick
  • Vaseline
  • Left over blush powder (organic is better)


Instructions

Place vaseline and power in bowl, mix until ingredients are smooth.


Did you think that was going to be harder? Think about how much money you'll save doing this!

You're welcome :-P


xo Elise

P.S - homemade body butter


Images via Free People

Sunday Reads #5: National Anthems, Anger Translators & Sweaters for Penguins


As I'm writing this, it has been raining non-stop since I woke this morning. I spent most of the day writing, but took a breather to venture into the woods with my Mum for a nature walk. Yes, in the rain. Because it's the best time to go. And now I'm back to writing again.

How has your Sunday been?

  1. It's not too late to start your #YearOfFirsts

  2. I literally kept myself up till 1am laughing in the dark about this finale to our national anthem

  3. Meet Obama's anger translator

  4. OMG - knitted sweaters for injured penguins!!!

  5. The most AMAZING brownie sundae recipe

  6. Taylor Swift's cover of Riptide by Vance Joy - LOVE this!

  7. The baddest thing I've seen all year. HOOOOWWWW?!?!?!

  8. British humour.

  9. Uptown funk workout!

  10. 10 times reporters asked women the wrong question.

  11. This cat is literally a child.

xo Elise

Chocolate Nutella & Strawberry Pavlova (warning: drool effect initiated)


Chocolate Nutella & Strawberry Pavlova

If you're a kiwi you obviously know what this is (which by the way DID ACTUALLY ORIGINATE FROM NEW ZEALAND, Australia).

Anyhoo, the only time I ever have pavlova is sadly at Christmas time. That and I'm not entirely a big meringue fan. The texture weirds me out a little bit. Is it soft? Is it crunchy? Is it sticky? Is it crumbly? I don't know.

But in saying that, you DEFINITELY want to try this nutella pavlova recipe. In fact it should be illegal not to. Get my drift? ;)


Chocolate Nutella & Strawberry Pavlova Recipe


Ingredients

  • 6 egg whites at room temperature
  • 1 cup of caster sugar
  • 3 tsp cocoa powder
  • 300ml cream
  • 1/2 cup Nutella
  • 1 punnet of strawberries

Instructions

  1. Heat oven to 150°C 
  2. Put some baking paper on two baking trays. 
  3. Beat the egg whites until they form soft peaks using an electric beater. 
  4. Slowly add 2 tablespoons of the sugar at a time, while beating on high. (make sure that the sugar has all dissolved in before adding the next lot).
  5. Add the cocoa and fold through with a spatula.
  6. Then spoon the mixture evenly onto the tray in a circle.
  7. Place tray in the oven for 1 to 1 1/2 hours or until golden and crisp.
  8. Leave to cool in the oven after cooked for 45 minutes for the best results.
  9. Beat cream with an electric mixer until fluffy.
  10. Pull meringue out of oven and transfer bottom layer onto a cake stand or plate.
  11. Spread half of the whipped cream over the bottom layer.
  12. On top of the cream add half of the nutella spread (to make runny, pop it in the microwave for 10 - 15 seconds).
  13. Chop strawberries and sprinkle on top.
  14. Repeat with second layer.
  15. And to finish, add a sprinkle of icing sugar with a sieve.

xo Elise

P.S - easy vanilla & berry chia pudding


Image via Love Swah

What Is Washi Tape Used For?


What Is Washi Tape Used For?

There's a lot of hype going around about the elusive "washi tape". But today I'm gonna answer the obvious..

"What is washi tape used for?"

Washi tape is literally decorative sticky tape. Originally it was used to give that extra touch of colour on gift wrapping. But now? We use it on EVERYTHING.

If you haven't used the 'mysterious' tape yet, I suggest you get yourself a set and experiment with it.

I love it because it's a simple way of expressing your personal style in your home or on your personal items and accessories - without taking a ridiculous amount of time to complete. It's the perfect item to craft with :)

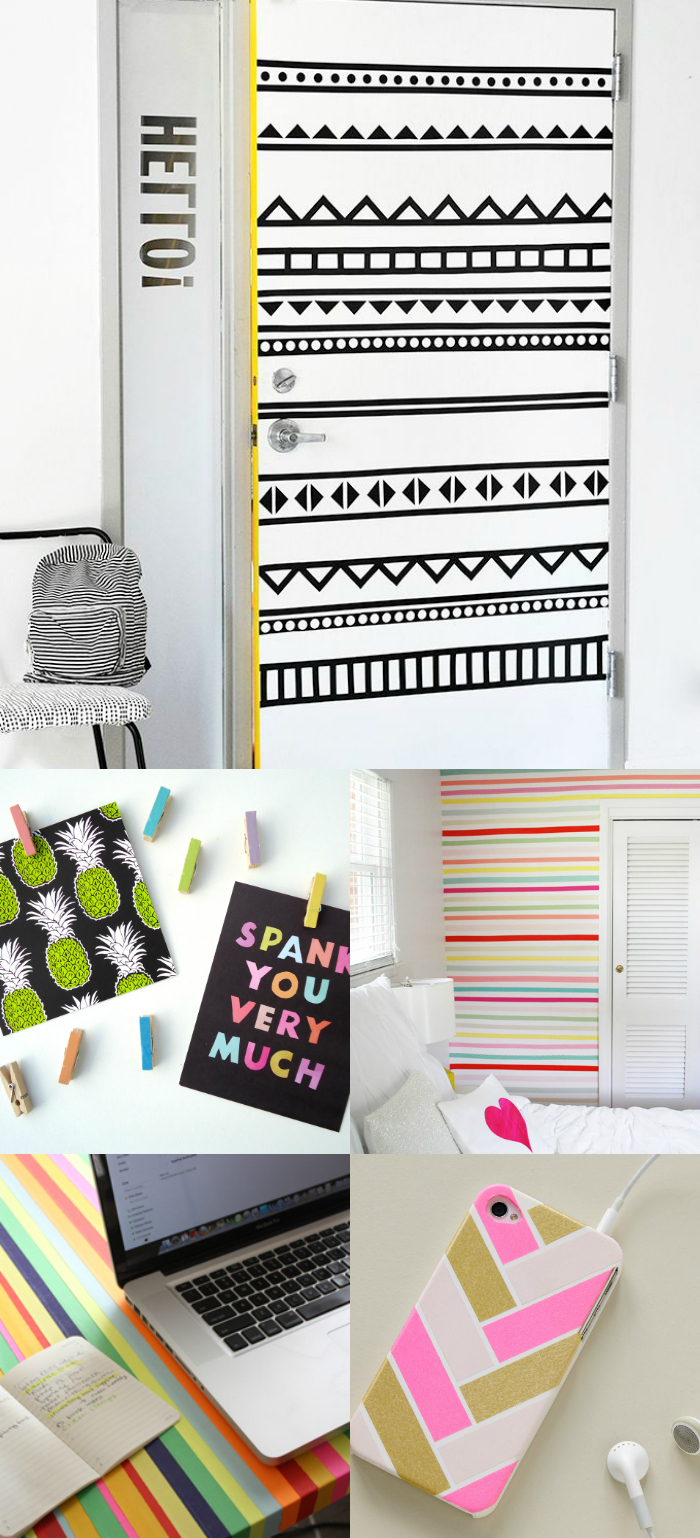
Below are 10 of my favourite washi tape examples:

  1. DIY Washi Tape Wooden Pegs

  2. Simple Washi Tape Ring Dish Tutorial

  3. Colourful Stripe Washi Taped Table

  4. DIY Washi Tape Wall

  5. Washi Tape Herringbone iPhone Cover

  6. Geometric Graphic Door DIY

  7. DIY Washi Tape Bookmark

  8. DIY Washi Tape Light Switch Cover

  9. Glitter Washi Tape Binder Covers

  10. Simple Washi Tape Greeting Card Tutorial

How do you like to use your washi tape?


xo Elise

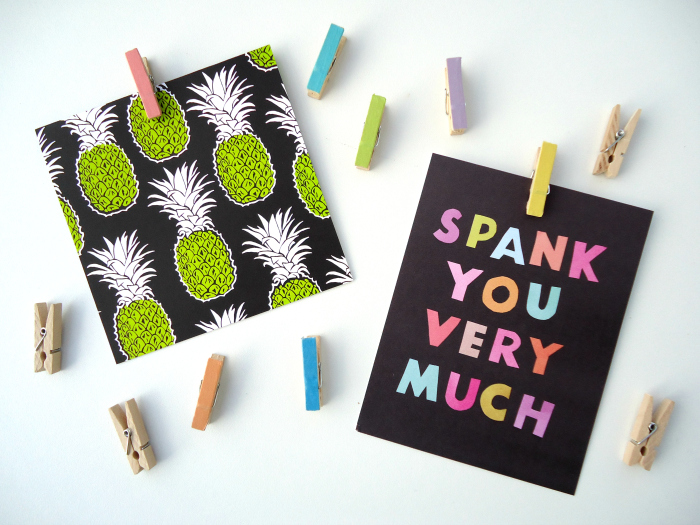
DIY Washi Tape Wooden Pegs


DIY Washi Tape Wooden Pegs

Do you get Happy Mail? You should. Imagine never having to buy another greeting card EVER AGAIN. I've signed up for 12 months. Can you imagine how many cards I'll have at the end of my subscription!?

Anyway, my point is, I have received quite a lot of cards that I love the designs and quotes of, and instead of giving them away I want to display them around the house as art.

I thought of doing this by clipping some in a row with wooden pegs, but the pegs looked a bit dull, so I decided to give them a bit of colour!

Materials


  • A dozen wooden pegs
  • Coloured washi tape

Directions

Lay out a strip of your chosen washi tape on the flat side of the peg, if you can tear it off do that, it not, cut it finely at the edge of the peg. DONE!

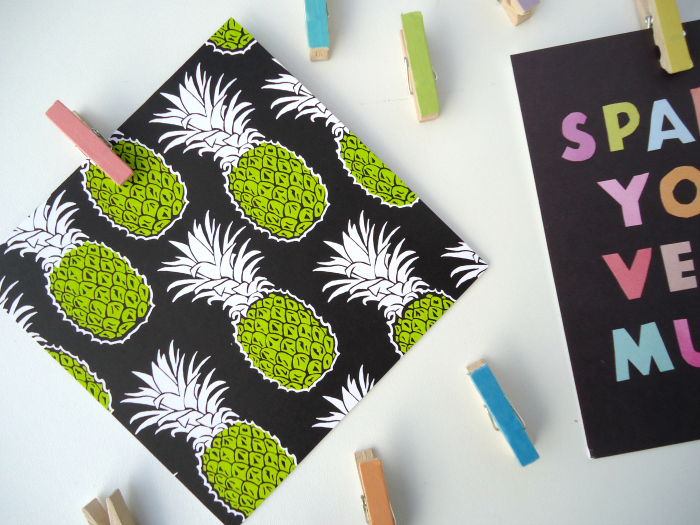
DIY Washi Tape Wooden Pegs

How easy was that?


xo Elise

P.S - washi tape ring dish tutorial :)

Sunday Reads #4: Indoor Gardens, Homemade Gifts & ANZAC Day


Sunday Reads #16: Paris Letters, DIY Beauty & Indoor Gardens

Hey, it's a beautiful day!

I'm spending the long weekend back home. That involves long walks in the forest, breakfast at the markets, enjoying natures spa and good ol' family time.

What about you?

  1. Lest we forget.

  2. Were you annoyed with the How I Met Your Mother finale? Well here's an alternative.

  3. Homemade gift ideas

  4. two ingredient pancakes

  5. 10 DIY beauty secrets from your own garden

  6. Two of my faaavourite prints on etsy. here and here.

  7. 5 indoor garden ideas

  8. Ewwwwwwwwww!

  9. Ever wanted to receive letters from Paris?

  10. Cocktail recipes resource

xo

Homemade Body Butter


Homemade Body Butter

I've never been a fan of smothering loads of chemicals all over my body. I really try to keep my "beauty applications" to the bare minimum. To be honest, if I didn't have to wear beauty products I wouldn't. But alas, this is not the world we live in.

So instead, I like to find alternative 'as-natural-as-possible' ways to keep my skin and body moisturised. And the best way I've found doing this is if I know exactly what's in the products. Thus going homemade!

Try this body butter recipe.

Ingredients
  • half a cup of shea butter
  • quarter cup of coconut oil

Instructions
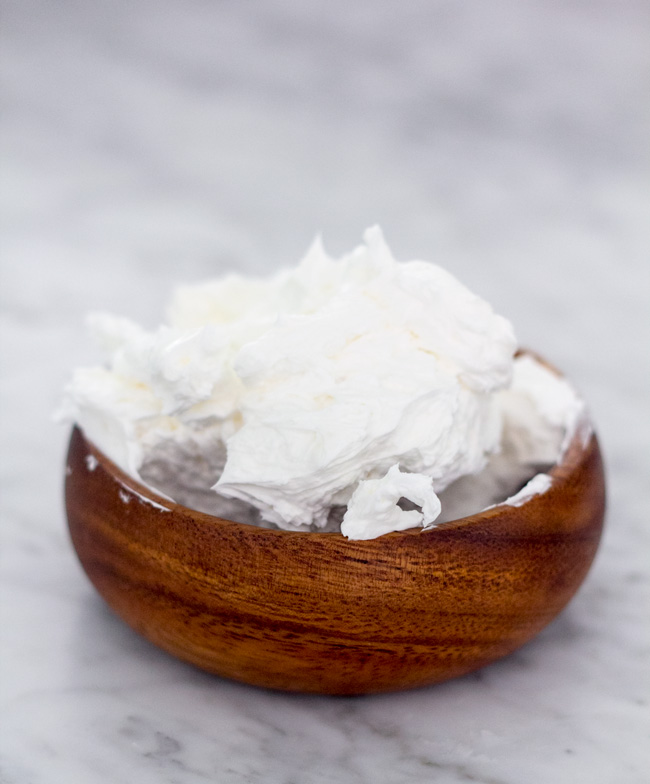
Melt the shea butter and coconut oil in a saucepan on a low heat. It should take a couple of minutes, not that long. Once melted together pour into a silicon mould or if you don't have one, just a regular plastic bowl. Place in the fridge to cool down. This takes roughly an hour. Once solid, beat the ingredients with a hand mixer until the mixture becomes fluffy. Transfer the mixture into a sealable container, use a spoon to scrape out the sides. Keep in a cool area.

And there you go, your very own inexpensive natural homemade body butter!


xo Elise


P.S - homemade honey bubble bath


Image via Hello Natural

Easy Snack: Raspberry Choc Bites!


Easy Snack: Raspberry Choc Bites!

To be honest, I think my 'sweet snack' palate is a little boring. Because really all it is, is chocolate. Cadbury or Whittakers, and that's it. I'm rather limiting myself don't you think?

So in an attempt to bring some life to my tastebuds, I found this simple recipe to start with.

Ingredients

  • Fresh Raspberries
  • Chocolate Drops

Directions

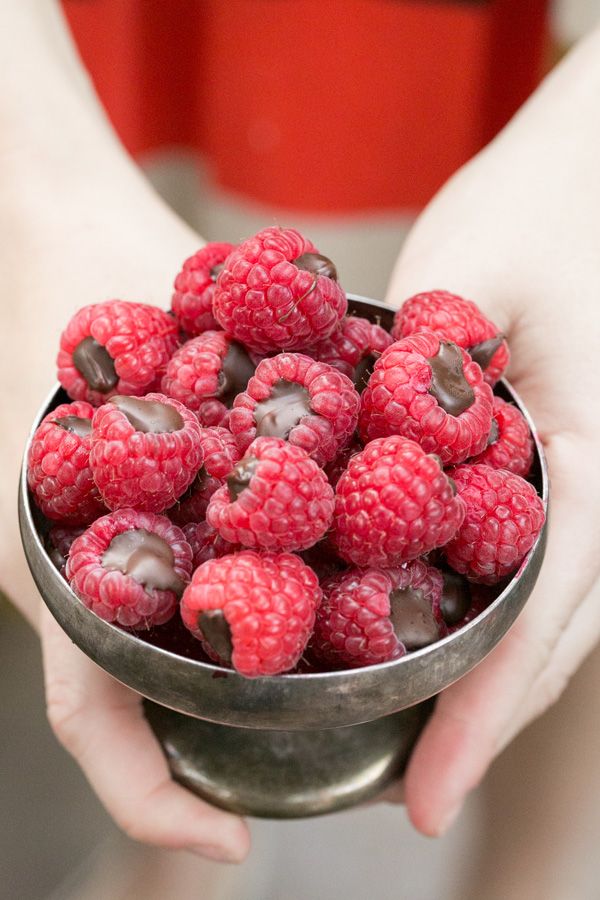
Take one chocolate drop and place inside raspberry. If you want the drops a little melted, heat the chocolate drops in a saucepan with a little coconut oil. Once melted, pour into the ends of the raspberries, set them on baking paper and place them in the fridge to cool. SO delicious!


Enjoy!


xo Elise

Image via Sugar & Charm

50 Things To Do When You're Bored


Were you one of those kids who would annoyingly profess "I'M BORED" at the top of your lungs, expecting your Mother to stop slaving away at the casserole she's been preparing for hours for tonights family dinner?

*slowly raises hand* 

*hurriedly tucks it back down to avoid looking like that irritating kid from The Middle*

Well now we're grown ass adults. We wear big girl pants and drive a big girl car and pay big girl bills and make big girl dinners. Well maybe not big girl dinners. Mum will always be the best at those - and she knows it too!

But being in our twenties, there is literally no reason we should ever get bored.

Lazy? Yes.

Bored? No.

But sometimes we forget you know? It's not like the minute we get home we can just drop all our crap at the front door and run off to the next door neighbours house to play bat down and expect our room to be tidy, washing to be done and dinner to be made. That doesn't happen any more. Why god whhhhy..

We can forget about the fun, the little things that make life worth while. So on those days when you are bored *coughlazycough*, use this resource to get yourself out of that funk.


50 Things To Do When You're Bored


Take a Walk In The Woods: Grab your sneakers and head out to the forest! There's nothing more rejuvenating than taking a walk in the native bush, plus you get to pretend you're an adventurer hunting for treasure! Or is that just me?

Create a Scavenger Hunt: You don't have to be a kid to do half the things here. Make a night out of it with your friends and have really cool prizes or even better, dares! Ooooooo....

Have a Picnic in the Park (or your backyard): Pack some simple sammy's, cut up some fruit, bake some cookies and take a bottle of wine. Bring your teddy bears, or maybe just your friends, OR make it a date with someone special!

Fly A Kite: Don't roll your eyes. When was the last time you flew a kite anyway? Go one step up and make your own kite, or one more step up and try a kite surfing kite!Windy? Make it a competition with you and another and see whose kite does best!

Play Sports the Beach: If it's a hot day, take your cricket set, frisbee, rugby or soccer balls down to the beach with a few friends and have some fun. Take some sausages and make it a BBQ!

Go Vintage Shopping: Grab your girls or step out and go it alone. See what treasures you can find at your local thrift stores and op shops.  I've found some AMAZING items at ridiculous prices!

Make A Recipe Book: You know how you keep ripping recipes out of magazines and then hoarding them in a folder? Well spend an afternoon cutting, pasting and prettying them up in your very on DIY recipe book!

Make a Self Love Bible: If recipes aren't your thing, grab some old magazines, flip through the pages and cut out images that promote healthy self-image and esteem to you. Stick em into your own pretty self-love bible.

Start Your Own Veggie Garden: Instead of staring at a messy backyard, try your luck with making your very own veggie patch! Now I'm not talkin' go Martha Stewart on me but maybe this year try a tomato plant or a baby lettuce plant. Go on, I know you want to you little domesticated squirrel!

Read Your Fave Blogs Archives: We've all got fave blogs and usually they've been around for quite some time. Spend a day just trawling through the posts!

Visit Your Local Museum: Go by yourself to your local museum and take a walk back through history. Learn about things you never heard of and even take one of the guided tours! They're the best!

Host A Pot Luck Dinner: Set a date, give your friends a list of who needs to bring what and make it a super fun night!

Have a Bake Off With A Girlfriend: It's always fun to get together with your BFF and have a bake off. Reason being? The prize is you get to gobble up the treats afterwards!

Have a Karaoke Night: Bust out the Singstar, maybe make a few margaritas and have yourself a fun night. (Just make sure you don't get whacked in the face by an over excited boyfriend trying to do a solo. It never ends well).

Become a Volunteer Dog Walker: Head down to your local SPCA or pet shelter and pop your name down to be a volunteer dog walker. You get to dote on any dog of your choice and they get a break from being locked up in a cage all day. But most of all they get to have fun exploring new places/walks/streets/forests with you for an hour or so!

Start Your Own Blog: Ever thought about it? Well now I dare you too! Might just be the best decision you ever made!

Host a Clothes Swap: Get your girls to bring round all their unwanted clothes and add yours to the mix, fix up some fruity cocktails and have some fun shopping for free!

Have a DVD Night: Theme your night with either horror, rom-com or action, make up some popcorn, get a ton of blankets and you're set!

Donate Clothes to Charity: Rather than just letting those clothes you wont ever wear again grow dust in the back of your closet, donate them to charity where someone who needs them will have the opportunity to.

Have a Board Game Night: When me and my friends have these nights they are literally filled with so much laughter (like crazy ass hysterics) you can't contain yourself. My favourite recommendation? Balderdash.

Visit The Art Gallery: Pop your inquisitive hat on and head down to your local art gallery to check out the current showcases.

Have a Music Trade With Your GF: Bring the old school CD's back and trade em with your gf. You can use this as a way to get to know each other too! Girl bonding!

Create a Flash Mob: Get a group of yourselves together, create a routine, plan your attack and go for it! (PS - Send me the vid will ya!?)

Watch a Play: Whether it's local or a fancy pants broadway spectacular, get your ass down there! I never used to go until my friend forced me to one night, I never knew what I was missing out on!

Play 'Man Hunt': Get your flashlights, dress in black, know your perimeter and hide. First one back to base without being caught get's a large cocktail made by the loser!

Set Up a Burma Trail: Get rope, find a cluster of trees, wait for nightfall and send your friends into the woods. Bonus points if you purposefully try to scare them as they're going through!

Write Your Very Own eBook: Everyone has a book in them! Write your own and then sell it on amazon kindle. You could make a killing!

Visit The Zoo: Hit up your local zoo, watch the lions get feed, see the seals swirl around in their tanks and take tons of pics!

Do The 365 Day Photo Challenge: You've seen it done on facebook, now do it yourself! Bonus Points: Turn it into a folder/collage at the completion of your challenge.

Be Someones Admirer: Send flowers, love letters, chocolate and sweet sweet notes. Regardless of whether they find out it's you, you will make them feel so incredibly special.

Take Dance Classes: Wanna salsa? Maybe hip hop's your thing? No? Ooooooh I know! Burlesque! Sign up to move your booty and have an AWESOME time while you're at it.

Have a Slumber Party: Set up mattresses in the living room, have bowls of snacks and your favourite old school tv series (The OC) set to play back-to-back!

Try New Hairstyles: Jump on pinterest and find awesome styles you can try with your hair. Maybe you always have it tied up, well try a gorgeous half-and-half do!

Make a Gratitude Wall: Get out your post it notes and start writing one thing you're grateful for on each post-it. Then stick em on the wall. Soon you'll have a multi-colour wall of gratitude.

DreamStorm The Next 5 Years: Brainstorm is so 20 years ago, now it's about dreamstorming or heartstorming as some like to call it. Get out big sheets of paper, coloured pens and let your imagination run wild.

Start a New Hobby: Like tennis? Join a club! Wanna try acting? Sign up for a class! Intrigued by the idea of taxidermy? Get in there!

Go Mountain Biking: My hometown is like mountain bike central so I grew up with it. I swear it's the next best thing to a roller coaster!

Try Hiking A Hill: That hill/mountain you see in the distance? Spend saturday or sunday hiking up it!

Make Choc Chip Cookies for Someone: Everybody loves choc chip cookies! Make em with love for someone you love. They'll go down a treat!

Make Cards & Send Them To Friends: Rather than txting a message, or phoning, do something different and make your own card with a lovely message and send it snail mail styles to your friends.

Create a Photo Board: Go down to your local stationary store and print out photos you've taken recently and then stick em onto a board. Pop that board up on your wall and boom! instant wall art!

Spend The Day in A Book Store: Seriously, I can spend hours in borders. Try it! You'll be surprised at how long you wind up staying in there reading different books and magazines!

Create New Outfit Combos: Bring everything out of that crazy messy wardrobe and create new outfits for yourself. Put them together as a set in your wardrobe and then you wont have to worry about piecing them together again!

Have a Home Retreat: Buy some bubble bath, use those bath bombs you got for christmas or that bubble bath you've been meaning to make, play your most relaxing music and just soak. Later spend time laxing in the sun reading your favourite magazines and then have yourself a delicious scrumptious meal of your choice. Finish off with a decadent desert and a nights sleep in a freshly linen-ed bed. Ahhhh bliss.

Start Sewing: Your mothers sewing machine will be passed down to you so you might as well learn how to sew now while she's still here to teach you! You can get so good that you can start making your own outfits (which could save you a lot of money!)

Build a Fort: Outside or inside, it doesn't matter - it's a freaking fort! Make it homely and spend a few hours (or even the night) laying in it and talking about dreams and things.

Make a Giant Sized Board Game: Grab some free cardboard boxes from your local supermarket and then cut out pieces to make yourself a giant board game, you can even make a giant dice!

DIY Gifts for Friends: Get your craft on, buy some supplies and create something awesome for your loved ones. Make bulk and you wont have to worry about buying anything as a gift for a while!

Write Letters: To yourself, to a friend, to your mother, to whoever you want and send it.

Go to a Water Park: Get your friends, pop on your bikini and go splash about at your local water park. This day screams fun and excitement!

There you go, now you have absolutely no reason for boredom!


Tell me, what are your tips for keeping boredom at bay?


xo Elise

DIY Washi Tape Ring Dish


DIY Washi Tape Ring Dish

You know those moments when you become super overwhelmed by the amount of DIY's that are getting posted out there? And every one seems to be bigger and better than the other? You have those moments? Me too.

Sometimes it's good just to start with something simple. Just taking one thing and making it a little bit prettier. Like this ring dish..

DIY Washi Tape Jewellery Dish

Materials

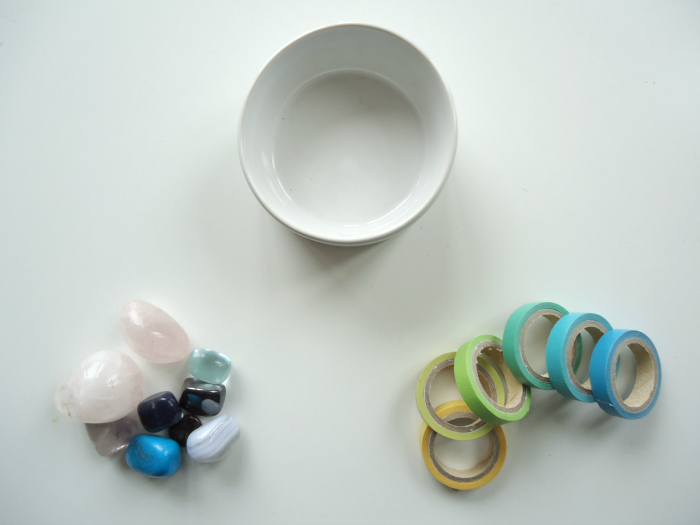
  • Ring Dish
  • Washi Tape

Instructions

Depending on the height of your ring dish, measure out between 1 to 2 inches then stick to the outside first and roll onto the inside. Change up your colours or keep em the same. I think all black would look awesome too.

Easy Washi Tape Ring Dish DIY

xo Elise

DIY Bath Bombs


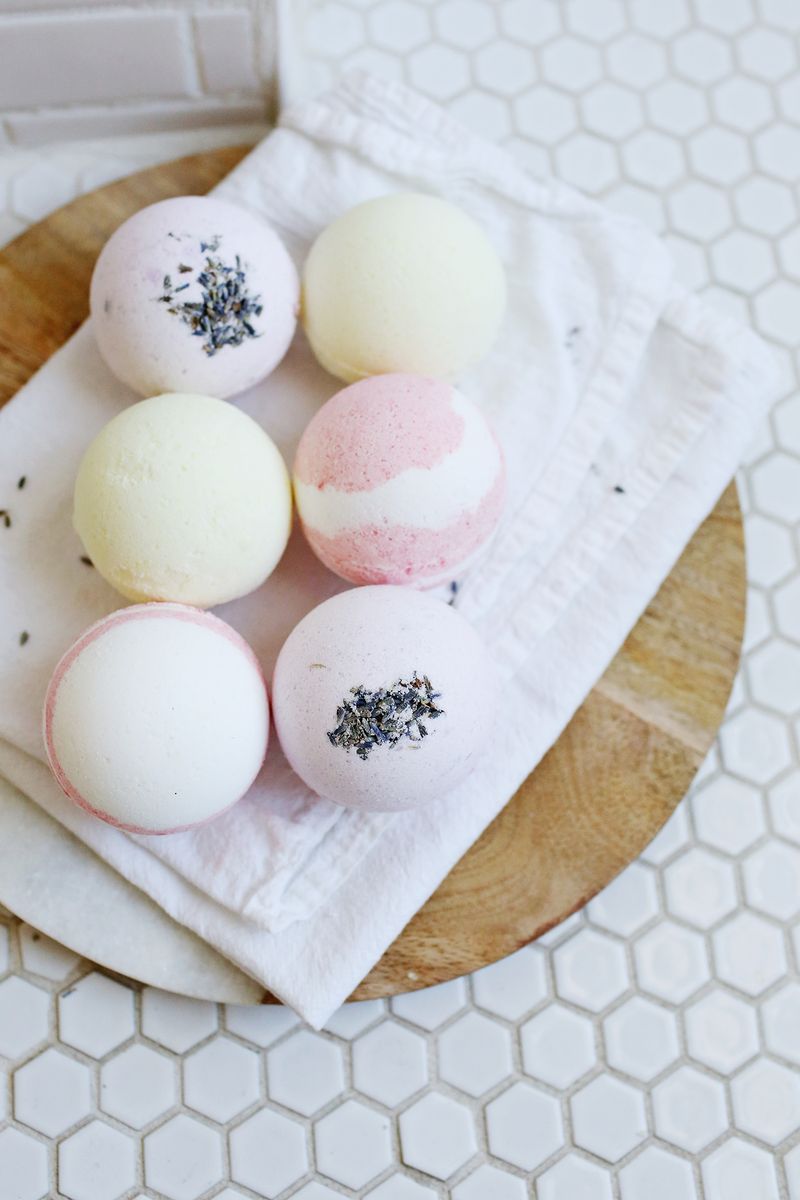
DIY Fizzy Homemade Bath Bombs

Having just moved into a house with a bath tub - FINALLY!!!! - I really want my first bath to be special.

For any type of bath products, Lush is where I go - even though the aromas wafting through the store give me an enormous headache.

When I saw this easy tutorial on A Beautiful Mess - I knew I had to share it with you, providing you do actually have a bath tub. I know how rare they can be these days!

Read the full tutorial here.

xo Elise

Sunday Reads #3: Cliff Diving, Photo Bombing & Valentine's Day


Happy Sunday!

What ya'll up to? I am down in the Coromandel for a Hens Weekend, probably hungover, (this is pre-written), and getting ready to head home soon.

  1. Valentine's Day cat pun printables

  2. The reason I want to jump off a cliff real bad

  3. Stephen Fry's reply to the question 'what he'd ask god when he dies'

  4. Jimmy Fallon, Chris Evans *drool* & Chris Pratt photo bombing at the Superbowl.

  5. Cuteness! How to let your turtle roam around without losing him

  6. I'm quite the sucker for recreating childhood photos! Aren't you?

  7. There maybe more Hunger Games movies!?!

Share your reads for today below!

xo Elise

Valentine's Day DIY: Healthy Dessert Table


Valentine's Day DIY: Healthy Dessert Table

When you think of Valentine's Day, you tend to think of three things.. 

Chocolate, Flowers and the fact you're getting neither.

I kid, I kid.

V-Day doesn't have to be about what you're getting from whom. What if you chose to do things differently and make it into a celebration with all of your loved ones instead - not just them romantic ones.

How?

Make a dessert table!

As you may know, it's one of my #YearOfFirsts goals to create a dessert table. I've been gathering inspiration everywhere. Mainly from pinterest. Okay only from pinterest.

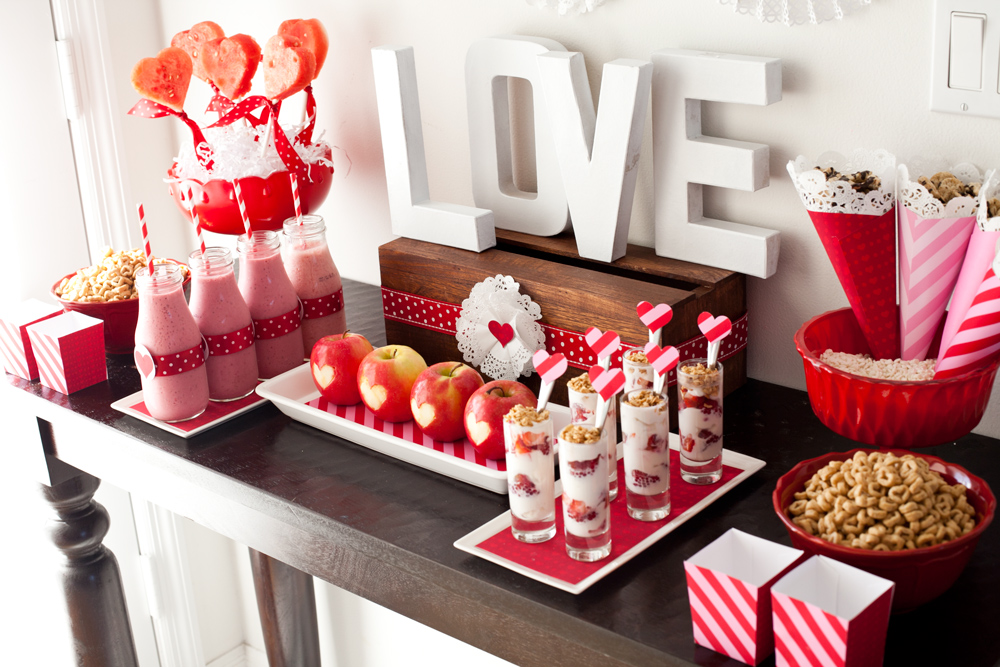
I love the idea of taking something traditional and adding a different spin on it. Hence this healthy dessert table DIY. If you're feeling all kinda lonesome or low on ideas for V-Day, and you're not overdosing on cat puns, you HAVE to give this dessert table a shot. Here's how..


  • Melon Heart Pops: Use a heart shaped cookie cutter or cut the outline with a sharp knife.

  • Carved Heart Apples: Carve a little heart shape into the skin of the apple, then squirt with lemon juice to keep from browning.

  • Dark Choc Dipped Wine Biscuits: These are just plain biscuits/cookies you get from the supermarket, get some dark melting choc to heat and then dip your wines into the mix and leave to set on a baking paper sheet.

  • Strawberry Parfaits: Get your favourite berries mine are blueberries, strawberries & raspberries - then layer with muesli and then plain yoghurt.

  • Cereal Bites: Make this a treat by serving it in a creative way, like out of a cone or small box. Mix with dried cranberries or raisins for a little more interest. Quaker just came out with a cereal, Whole Hearts, shaped like hearts that is packed with fiber and protein; it makes for a great little snack food addition to the dessert table.

  • Fruit Smoothies: Throw a handful of strawberries, natural yogurt and some ice in the blender and puree. Serve out of milk bottles.


Valentine's Day DIY: Healthy Dessert Table

What would your Valentine's Day dessert table snack be?

xo Elise

Images via Project Nursery

Pop Pilates for Beginners


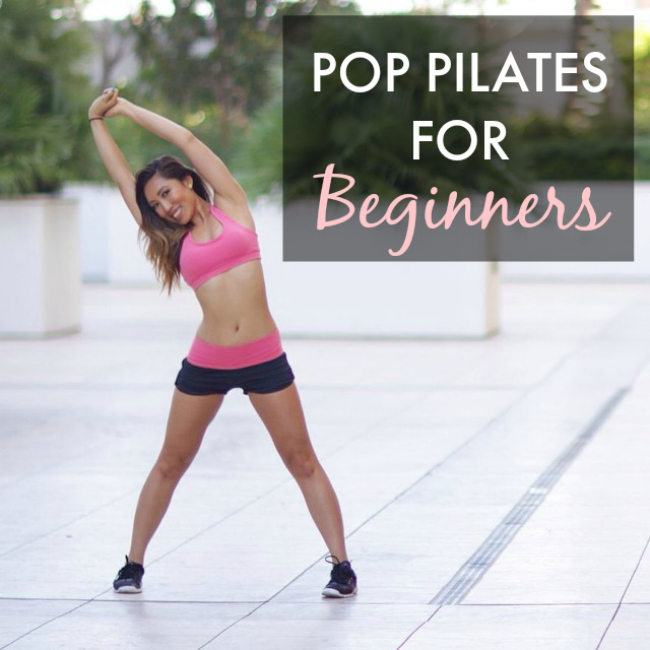
Pop Pilates for Beginners // Blogilates

Pilates has always scared the bejesus out of me.

They make it look deceivingly easy. "Lie down on a mat and flail your legs in the air", how hard could it be? TRY IT.

Thankfully I have never attempted pilates in front of humans before. Ain't nobody want to see that!

As part of my 'transform my body & get fitter' goal in my #YearOfFirsts tag (which you should totally join btw!), I've decided to face my fears and tackle pilates - cause let's face it - when you get to your mid to late 20's, things don't bounce back as easily as they used to, and you've got to try just a little bit harder to keep them the way they are. Right!?

Pilates for Beginners // Casey Ho

Enter, Casey Ho. I have been a Blogilates follower for the last few years and always find myself being drawn back to it every so often. The reason being is that Casey is so lovely, incredibly sweet, super bubbly, full or motivational spirit and totally genuine.

Of all the at-home workout vids I've seen, she is definitely the best. I think because it feels like she's interacting with you like a normal person, and goes off on tangents about random topics even though she's still teaching you what to do!

She's definitely a virtual workout buddy you want.

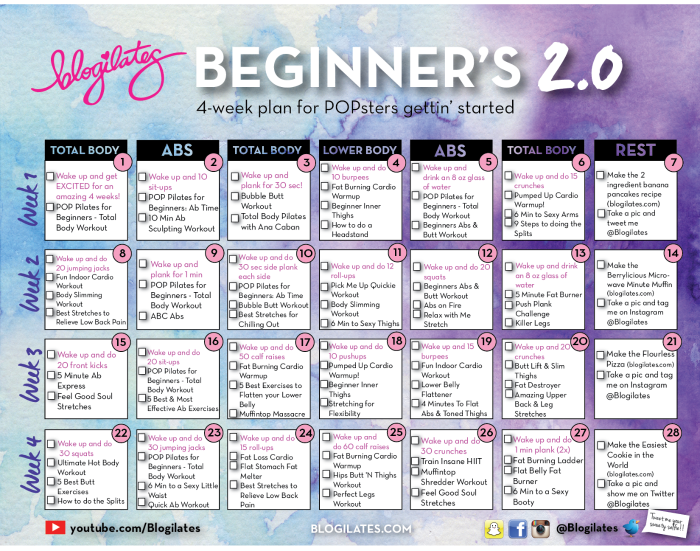
Casey created a 4 week beginners plan for people like me who want to give pilates a crack. I thought I'd give it a shot and let you know how I go. I mean, what's the worst that could happen? I get rock hard abs and a tight butt? :P

Blogilates for Beginners // 4 Week Plan // Casey Ho

Day 1: Today was the total body workout for beginners. I lasted all of 5 minutes. 5 MINUTES. Actually, not even that. My abs were quivering in the first 30 seconds. THE FIRST 30 SECONDS YOU GUYS. I have met my Everest.

Day 2: Okay I did my 10 sit ups, and no ab workout. I went for a 20 minute walk that included stairs instead. Back to the vids tomorrow, excited for the bubble butt workout! LOL.

Day 3: Bubble butt was a success! Extremely challenging when trying to balance on one knee, suck stomach in and tighten butt at the same time while lifting leg in the air. But it felt GOOD, like the first step to progress was being taken. I also went for a 30 minute power walk. Love my walks.

Day 4: I really liked today's fat burning cardio warm-up & inner thigh workout for beginners. I lasted both sessions, (skipped the headstand - not ready for that yet), and although the thighs were challenging it wasn't hard or exhausting. It's more mentally challenging with your tolerance to pain levels. Haha, it's only day 4 but I feel like I've made quite an improvement since day 1!

Day 5: No pilates today, but spent 20 minutes doing aerobics!

Day 6: I'm out of town for the weekend, so didn't get to do Day 6. BUT,  I went on a 3 hour walk and bike then went bodysurfing in the sea for half an hour.

Day 7: No pilates again, but went for a walk at the beach!

Day 8: I'll be back on it tomorrow!

Day 9: Started back up again and am a little bit sore today!

Day 10: These side planks are killer! Regular planks are a struggle let alone side planks!

Day 11: Okay the 6 minute sexy thighs is pretty awesome. Kicks my ass but I feel the burn!!

Day 12: Took a break today and went and played touch instead with my work colleagues. I think I should have just stayed home and done pilates. I am buggered!!!!

Day 13: Planks, planks, planks and more planks :'( I do feel like my abs are getting a lot tighter however!

Day 14: Rest day, oh my god I needed this.

Day 15: Went for a nice long flat walk out in the Waitakere's today. It was good to be outdoors in nature and get my body moving in a nice easy way.

Day 16: Back on it! The 5 minute ab express can kiss my butt! Ouch!

Day 17: Great workout today, I had so much energy! Even the ab workout wasn't too bad.

Day 18: Skipped pilates to play indoor netball today. Had so much fun, and got my heart pumping!

Day 19: So there's a lot of ab work going on. I feel myself quivering when I do the exercises but I also feel a heck of a lot stronger than when i began. Dare I say it, I think I have actual abs now!?

Day 20: Decided to take a rest day from all the ab work and just went for a walk around the neighbourhood instead. Saw the best sunset of my life!

Day 21: Played touch tonight. Oh man, so much running!

Day 22: It's the home stretch!! These butt exercises.. I LOVE THEM!!!

Day 23: I love how they call it a quick ab workout, because it never feels quick when you're doing it.

Day 24: I really just didn't feel up to anything today. Had kind of a bad day so relaxed in front of the couch, watched some Empire and ate chocolate. LOL

Day 25: Played indoor netball today! It was a killer game. We won though! That was amazing!

Day 26: Crunches! Ah I feel so strong now! And the soul workout. Damn. Did I just get fit?

Day 27: Okay I actually loved finishing off my challenge with abs and butt workouts. Kicked me to the curb butt damn I feel good!

Day 28: Phew! What a mission. I feel so damn proud of myself for my achievement. I never thought I could do it. But I can honestly say that I am fitter, tighter and stronger than 30 days ago and I love how I feel! This has definitely given me the confidence to continue on with doing pilates (which I thought I despised not so long ago!!!). Now, time for chocolate!!! :D

Have you tried pilates before? What would your tips be for beginners?

xo Elise

6 Valentine's Day Cat Pun Printables


You're Kinda Pawsome // Valentine's Day Cat Pun Printables

The day of luuuurve is upon us. Will you be celebrating with that special someone? I hope so! Even if it's your cat. Actually, especially if it's your cat, cat's deserve the good lovin' too.

So here you go. Print out these adorable Valentine's Day cat pun printables and give em to your loved ones. Or go one step further and hide them in different places so your significant other discovers them throughout the day. That's sure to brighten anyones day up!

When I'm With You I'm Feline Good // Valentine's Day Cat Pun Printables
You Are Purrfect. I'm Not Kitten You // Valentine's Day Cat Pun Printables
I Think You're Purretty // Valentine's Day Cat Pun Printables
Today Would Be Clawful Without You. Fur-Real // Valentine's Day Cat Pun Printables
I Like Your Cattitude // Valentine's Day Cat Pun Printables

So tell me, how do you celebrate valentines day?

xo Elise

Images via Rebloggy

Sunday Reads #2: Lip Sync Battles, Babies & Left Shark


It's Sunday already?? Booooooo, that means it's back to work tomorrow! Have you been enjoying your long weekend? I've spent mine with family at my cousin's wedding. Today we're all heading over to my uncles for a family feast - can't wait!

For those still in bed and not wanting to get up. Here's 11 reasons to stay right where you are.

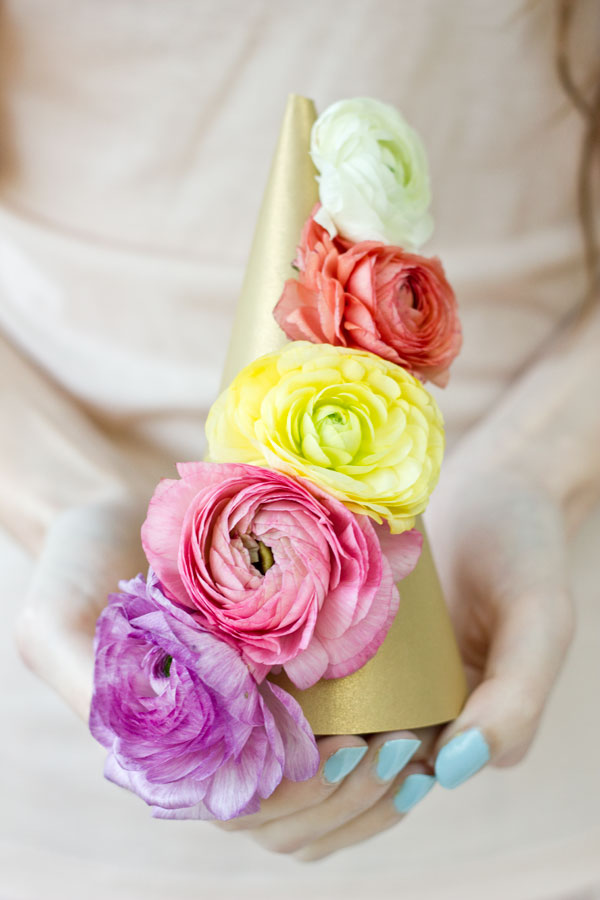
  1. DIY cascading flower party hats tutorial!

  2. Lip sync battle between Will Ferrell, Jimmy Fallon & Kevin Hart

  3. LOL. Almost drowning trying to be sexy!

  4. Should you give it all up & follow your dreams?

  5. Highlights from the bloggers #BrunchClub meet up!

  6. My favourite moment from Puss in Boots

  7. If you're having a bad day - watch this!

  8. 34 Gifs that'll make you LOL

  9. If you live in Auckland, come and do this with me!

  10. 3D calligraphy experiments.

  11. *Bonus* All hail left shark!

What's your Sunday Reading? Send me links!

xo Elise

Two Ingredient Gluten Free Pancakes


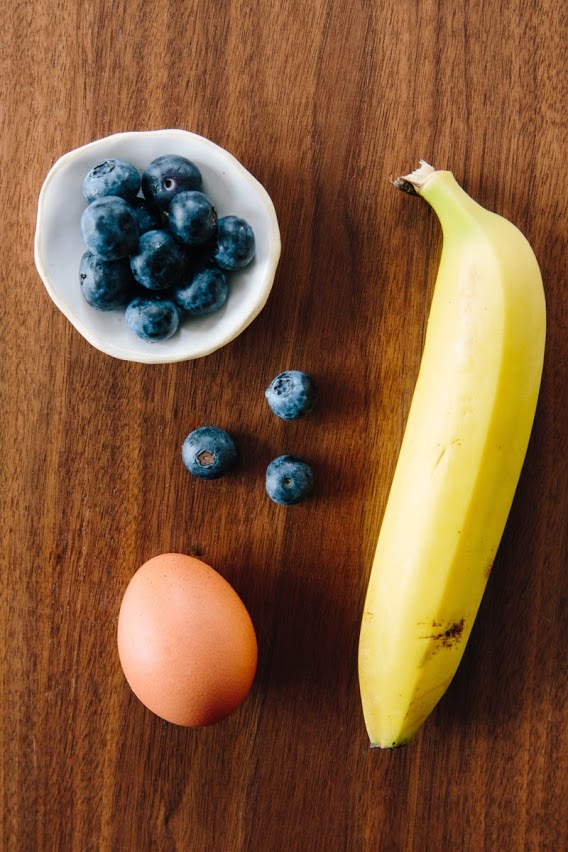
Easy 2 Ingredient Gluten Free Blueberry Pancakes

I've discovered I really like gluten free recipes. Every time I've tried a gluten free dish either at a work conference or when it's the only option at the cafe because the lunch time rush has cleared all the yum foods, I've never been disappointed. The food is so tasty, but leaves you feeling without the uneasy feeling in your stomach.

Ingredients

- 1 ripe banana
- 2 whole eggs
- blueberries (optional)

Directions

Blend & pour the batter onto your pan. That's it! If you don't have a blender, mash the banana as much as you like - you can have chunks of banana - add blueberries, or whatever extras you'd like included in your pancake batch. Use coconut oil on your pan on a medium heat setting, leave for 30 seconds to 1 minute depending on your stove, flip and serve!

Easy 2 Ingredient Gluten Free Pancakes

So ridiculously simple, you'll wonder why you never knew about these before today! Fastest esiest breakfast recipe EVER!

Have you tried 2 ingredient pancakes before? What other cheat recipes do you cook?

xo Elise

Images via Cup of Jo

Highlights from The White Rabbit


#BrunchClub at The White Rabbit

I felt the nerves kick in as I parked my car. Of course I parked my car at the top of Mt Everest's cousin knowing that I would inevitably have to haul myself back up it afterwards. Call it blogger brain maybe?

In a fluster, I arrived at our venue stylishly early and found my seat ready for my second ever blogger meet up, run by the ladies at #BrunchClub. Here are my highlights for the event..

1 // The Company. Sitting next to the lovely Genie from Bunny Eats Design who was such a pleasure to converse with. We got talking about an assortment of topics; babies, bangs, blog guilt and the fact that we both went to the same primary school! If you're a hardcore foodie, you definitely need to hurry over to her blog. I can't promise you won't suffer from severe drooling though.. ;)

2 // The New Faces. Meeting the wonderful Corinne from Frock and Roll who was kind enough to let me ogle her adorable and super brand new 6 month old baby Charlie. We talked about many things from blog goals and anxiety to aussie bloggers and baby daddys. I've never met a group of people that I've felt so comfortable with so quickly, that we can start conversations about random topics. I love it!

#BrunchClub at The White Rabbit

3 // The Venue. I'm a huge black and white decor fan and the cafe reminded me of our family farmhouse we used to visit in the summers when I was little. Simple, homely, yet urban.

#BrunchClub at The White Rabbit

4 // The Coffee. You know it's gonna be a good day when your flatwhite arrives with a heart sitting in a crescent moon. You just know it!

#BrunchClub at The White Rabbit

5 // The Baby. I was one of the lucky ones who got to sit next to this bundle of cuteness. Meet Charlie. Daughter of Corinne. Well behaved, full of sweet gummy smiles and a little flirt when it comes to pirates. Be warned, if you get the chance to sit next to her, you'll be inclined to forget about everything you were meant to be doing and play with her for the entire event!

#BrunchClub at The White Rabbit

5 // The Food. Even though my first attempt at eating my scrambled farm eggs on rye sourdough with dry cured house bacon resulted in half of my sourdough shooting off my plate and onto the floor next to the pirates. These were the best damn scrambled eggs I've ever had.

The White Rabbit, Customs Street, Auckland

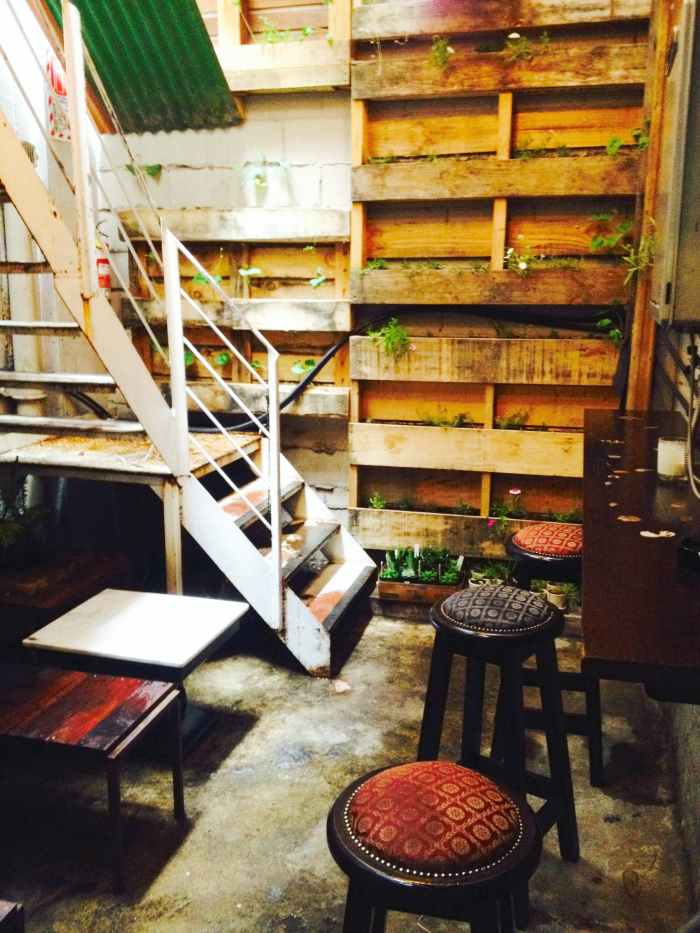
6 // The Hidden Bar. Which took me to a fantasy of silver moustached gentlemen sipping brandy with one hand and inhaling a cigar in the other. This and the fact that the room was made from recycled materials.

The White Rabbit, Customs Street, Auckland

The White Rabbit, Customs Street, Auckland

The White Rabbit, Customs Street, Auckland

The White Rabbit, Customs Street, Auckland

7 // The Announcement. And of course the exciting new announcement Madi and Laura made regarding the direction of #BrunchClub. Find out more here.


Have you been to a #BrunchClub meet up yet? What have been some of your highlights from the events?

xo Elise

DIY Cascading Flower Party Hats


DIY Cascading Flower Party Hats

I'm a fan of parties - especially garden parties - and if I ever throw one I like things to be pretty from start to finish. Must be an inner girly girl thing?

Party hats are totally underrated, and should be worn by adults WAY MORE OFTEN, and not as a joke! We're so quick to drop the small fun things from our childhood, let's stop that. It's the small things that make life that much sweeter.

With that being said, at your next shindig - I demand that you have party hats! Not just any kind of party hats, but party hats with flair!

Supplies

Fresh Flowers
Party Hat Template
Scissors
Glue or Tape
Hot Glue

Instructions

Cut your party hat template out of your cardstock and glue or tape together into a cone shape.

DIY Cascading Flower Party Hats     DIY Cascading Flower Party Hats

Cut all the stems as close to the base of the flower as possible. mine off the stems. Place a dot of hot glue on the bottom center of the flower. Carefully but firmly glue your flowers in a cascading effect slightly wrapping around the party hat one by one. Start from the bottom.

DIY Cascading Flower Party Hats     DIY Cascading Flower Party Hats

Let the flowers set, and there you have yourself pretty hats for your party!

Are you a fan of parties? What would be your party style? Tell me in the comments below!


xo Elise


Images via Studio DIY

Contact Form